Create custom item decals: Difference between revisions
Jump to navigation
Jump to search
mNo edit summary |
No edit summary |
||
| Line 6: | Line 6: | ||
#In the next step, put additional decal images, if any. | #In the next step, put additional decal images, if any. | ||
#Right click the uploaded images and copy the image URL. | #Right click the uploaded images and copy the image URL. | ||
#Visit https://testing. | #Visit https://testing.potato.tf/generateattr.html | ||
#Paste the image URL and copy the result into the TFBot of choice | #Paste the image URL and copy the result into the TFBot of choice | ||
Revision as of 07:44, 21 February 2022
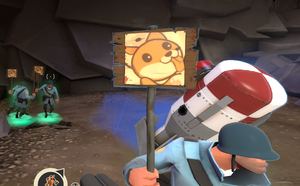
This guide tells how to create decals for use in items like The Conscientious Objector

- Prepare 128x128 PNG images you want to use for the decals
- Create a new TF2 Guide with this link (do not publish it): https://steamcommunity.com/sharedfiles/editguide/?appid=440
- Put one of your decal images as a thumbnail, type whatever you want in text boxes (they are not published anyway)
- In the next step, put additional decal images, if any.
- Right click the uploaded images and copy the image URL.
- Visit https://testing.potato.tf/generateattr.html
- Paste the image URL and copy the result into the TFBot of choice
Extra step to use the attributes in vanilla mvm (cosmetics only)
Equip the item with this command on testing servers, replacing the numbers with your own attribute numbers:
sig_makeitem @me "The Conscientious Objector" "custom texture lo" "x05ECED38" "custom texture hi" "x17A1F0CA"
. Then execute another command:
sig_listitemattr @me
From console, copy values marked in red, without parentheses, and use those as attribute value for custom texture lo and custom texture hi respectively
