Create custom item decals: Difference between revisions
Jump to navigation
Jump to search
No edit summary |
|||
| (One intermediate revision by the same user not shown) | |||
| Line 1: | Line 1: | ||
This guide will explain how to create custom decals for items like the Conscientious Objector. These decals can also be used on vanilla servers | This guide will explain how to create custom decals for items like the Conscientious Objector. These decals can also be used on vanilla servers | ||
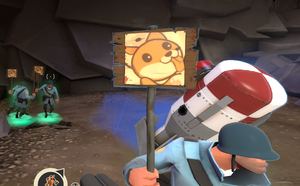
[[File:Signs2.png|thumb|Example use of the item decal]] | [[File:Signs2.png|thumb|Example use of the item decal]] | ||
| Line 10: | Line 10: | ||
#Visit https://testing.potato.tf/generateattr.html | #Visit https://testing.potato.tf/generateattr.html | ||
#Paste the image URL and copy the result into your TFBot of choice | #Paste the image URL and copy the result into your TFBot of choice | ||
[[Category:Tutorials]] | [[Category:Tutorials]] | ||
Latest revision as of 12:47, 29 December 2022
This guide will explain how to create custom decals for items like the Conscientious Objector. These decals can also be used on vanilla servers

How To Use
- Prepare a 128x128 PNG images you want to use for the decals
- Create a new TF2 Guide with this link (do not publish it): https://steamcommunity.com/sharedfiles/editguide/?appid=440
- Put one of your decal images as a thumbnail, type whatever you want in text boxes (they are not published anyway)
- In the next step, put additional decal images, if any.
- Right click the uploaded images and copy the image URL.
- Visit https://testing.potato.tf/generateattr.html
- Paste the image URL and copy the result into your TFBot of choice