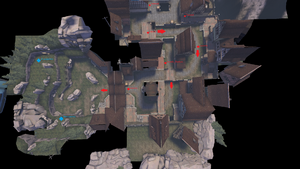
Reverse MvM Beginners Guide
Reverse MvM refers to a combination of custom keyvalues that flips the teams and win conditions. Instead of defending against hordes of robots, players are spawned on the blue team and must fight their way to the hatch and deliver the bomb. Designing missions around this concept can be very complex and requires heavy usage of Point Templates. It is highly recommended that you have a basic understanding of hammer and map logic beforehand.
An example popfile for Rottenburg can be found here
Getting Started
Because many maps were not designed for this mode, it is recommended that you go through your map of choice and remove unwanted map entities, cover up holes in bot spawn with prop_dynamic, and generally prepare your map beforehand. For the bulk of custom logic, a logic_auto in combination with AddOutputs is recommended, as it will instantly trigger when a new wave loads. For example, if your mission gives the blue team infinite ammo, it wouldn't hurt to remove redundant ammo packs from the map like so
logic_auto
{
     "origin" "0 0 0"
     "targetname" "mainrelay"
     "OnMapSpawn" "item_ammopack*,Kill,,0,-1"
}
Many maps do not have gates or doors blocking the blue spawn area and will require you to add your own blockades. This can be as simple as placing a prop in front of the spawn and killing it when the wave starts, or as complex as creating a moving gate using func_tracktrain. For our example, we'll be using a func_forcefield, an invisible wall which can be disabled and enabled when wave start/end relays trigger using some basic AddOutputs
PointTemplates [$SIGSEGV]
{
	corelogic
	{
		NoFixup 1
		logic_auto
		{
			"origin" "0 0 0"
			"targetname" "mainrelay"
			"OnMapSpawn" "item_ammopack*,Kill,,0,-1"

			"OnMapSpawn" "wave_start_relay*,AddOutput,OnTrigger spawnbarrier:Disable:0:-1,0,-1"
			"OnMapSpawn" "wave_finished_relay*,AddOutput,OnTrigger spawnbarrier:Enable:0:-1,0,-1"
		}
	}
	forcefield
	{
		NoFixup 1
		func_forcefield
		{
			"disablereceiveshadows" "0"
			"origin" "2724.365479 -2303.941650 -143.139458" //rottenburg spawn
			"angles" "0 90 0"
			"renderamt" "255"
			"rendercolor" "255 255 255"
			"renderfx" "0"
			"rendermode" "10" //10 = don't render
			"TeamNum" "2" //2 for red, 3 for blu
			"targetname" "spawnbarrier"
			"mins" "-300 -300 -300"
			"maxs" "300 300 300" //300x300 hu cube
			"StartDisabled" "0"
		}
	}
}
* is a wildcard that can be used to reference multiple entities with the same prefix. It is only limited to suffixes (*_start_relay* would not work)
For more complex maps with a lot of entities, it may be beneficial to strip away unnecessary decorative elements of the map to avoid hitting the edict limit. move_rope and keyframe_rope for example.
Lose Condition
In order to fail the wave when players lose, you will need to add your own game_round_win entity like so:
PointTemplates [$SIGSEGV]
{
	LoseRelay
	{
		NoFixup 1
		game_round_win //ignore this
		{
			"origin" "0 0 0"
			"TeamNum" "2"
			"targetname" "bots_win_red"
			"switch_teams" "0"
			"force_map_reset" "1"
			"classname" "game_round_win"
		}
		logic_relay //trigger this
		{
			"origin" "0 0 0"
			"targetname" "redwin_relay"
			"OnTrigger" "bots_win_red,RoundWin,,0,-1"
		}
	}
}
It's up to you to decide how you want players to lose. Timers, VIP Escort, and Tanks are popular ways to do so.
Upgrade Station
Upgrade stations will need to be placed in blue spawns. Do your best to strategically place these in areas that don't interfere with spawn points and use them to cover up holes in the map.
		station
		{
			NoFixup 1
			func_upgradestation //upgrade station entity
			{
				"mins" "-105 -100 0"
				"maxs" "105 100 242"
				"solid" "0"
			}
			prop_dynamic //blu upgrade station model, can be found on potato servers
			{
				"targetname" "upgradestation"
				"angles" "0 0 0"
				"DisableBoneFollowers" "0"
				"disablereceiveshadows" "0"
				"disableshadows" "1"
				"ExplodeDamage" "0"
				"ExplodeRadius" "0"
				"fademaxdist" "0"
				"fademindist" "-1"
				"fadescale" "1"
				"MaxAnimTime" "10"
				"maxdxlevel" "0"
				"MinAnimTime" "5"
				"mindxlevel" "0"
				"model" "models\props_mvm\mvm_upgrade_blu.mdl"
				"modelscale" "1"
				"PerformanceMode" "0"
				"pressuredelay" "0"
				"RandomAnimation" "0"
				"renderamt" "255"
				"renderfx" "0"
				"rendermode" "0"
				"SetBodyGroup" "0"
				"skin" "0"
				"solid" "0"
				"spawnflags" "0"
				"origin" "0 0 0"
			}
			prop_dynamic //invisible collision prop
			{

				"targetname" "shopcollision"
				"angles" "0 -90 0"
				"DisableBoneFollowers" "1"
				"disablereceiveshadows" "1"
				"model" "models/props_vehicles/train_flatcar_container.mdl"
				"disableshadows" "1"
				"ExplodeDamage" "0"
				"ExplodeRadius" "0"
				"fademaxdist" "0"
				"fademindist" "-1"
				"fadescale" "1"
				"MaxAnimTime" "10"
				"maxdxlevel" "0"
				"MinAnimTime" "5"
				"mindxlevel" "0"
				"modelscale" "1"
				"PerformanceMode" "0"
				"pressuredelay" "0"
				"RandomAnimation" "0"
				"renderamt" "0"
				"renderfx" "0"
				"rendermode" "10"
				"SetBodyGroup" "0"
				"skin" "0"
				"CollisionGroup" "5"
				"solid" "6"
				"spawnflags" "0"
				"StartDisabled" "0"
				"origin" "0 0 0"
			}
		}
Pacing and Structure

While the majority of existing mvm maps are suitable, longer maps that have more complex paths to the hatch are best suited for reverse. Bigrock, Mannhattan, and Rottenburg are examples of valve maps where it is relatively easy to stop players from blast jumping directly to hatch, due to their layouts and/or overall length. Shorter and more open-ended maps such as Decoy, Mannworks, and Coaltown are still completely valid options, however they will require ample counter-measures to avoid players bypassing the map and camping at the hatch, usually by blocking the hatch until the last subwave is ended and/or adding very strong defenses.
Once you've identified a map you feel is best for your mission, the next step is to create bot spawns that move progressively closer to the hatch, combined with sub-waves that give players adequate time to move forward and engage in the next sub-wave after it. If each sub-wave and spawn location is balanced correctly, players will not spend the majority of their time in one part of the map. If spawns are too fast and too close together, the mission will be a slog and players will struggle to progress. If new sub-waves are too slow to begin and spawns are spread too far apart, the threat will be too spread out and players can simply ignore the next sub-wave, head straight to the hatch, and let everything come to them. Do your best to strike a balance between these two extremes.
Maps with gates are very useful for structuring your waves at the cost of simplicity. You can enable/disable bot spawns and connect your own custom logic to the outputs of the maps trigger_timer_door entity using AddOutput, giving you the option to add rewards or enable new mission mechanics when capturing a gate.